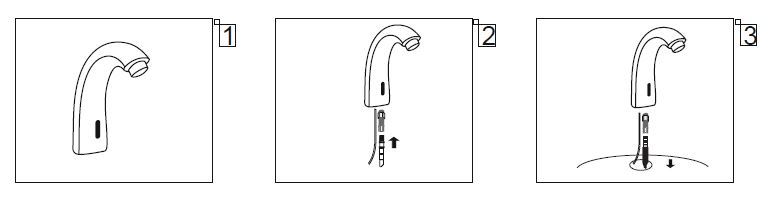
Typical Sensor tap Installation

sensor tap installation

The installation of Autotaps electronic taps is quite straightforward and easy to implement, especially if you’re running the system off battery-power option. It’s important that you have adequate water-supply pressure, and your system is properly flushed relieving of any trapped air or dirt.


In most cases, the tap supplied/bought will be a single-supply type (as shown below), and care must be given to adequate and safe water temperature to end-users. A thermostatic mixer valve will be required to regulate/mix hot and cold water to a safe temperature.


If your water is already mixed, or you’re feeding/supplying the control box with only cold water supply, then a thermostat or a blending valve will not be necessary.


  • Steps 1 - 3 SETTING UP SENSOR TAP FOR INSTALLATION


    Sensor tap installation picture

    1. Remove Sensor tap from its packaging
    2. Connect the flexible hose to the base or bottom
    3. Feed the flexible hose through the sink hole


  • Steps 4 - 6 
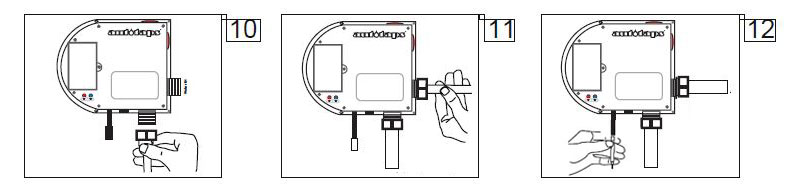
FIXING OF SENSOR TAP TO THE SINK AND REMOVING THE BATTERY COVER


    Sensor tap installation picture

    • 4. Attach fittings to the base of the tap and securely fasten
    • 5. Open the battery compartment
    • 6. Take out the battery box


  • Steps 7 - 9 
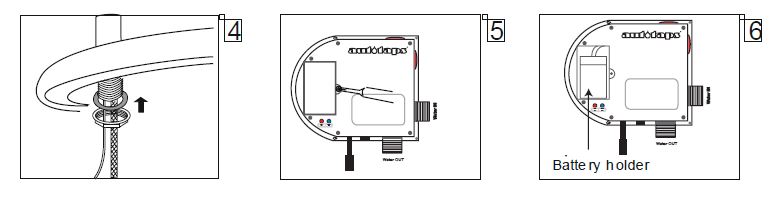
INSTALLATION OF BATTERIES AND FIXING CONTROL BOX TO THE WALL


    Sensor tap installation picture

    • 7. Open the battery box
    • 8. Insert 4x AA alkaline batteries of the same brand
    • 9. Securely attach the control box to the wall


  • Steps 10 - 12 
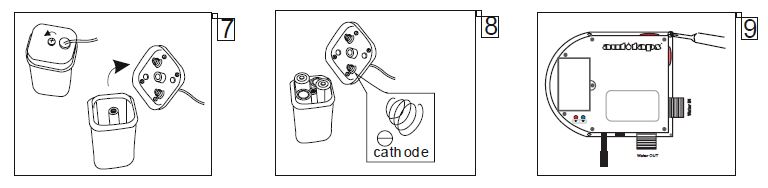
INSTALLATION OF WATER SUPPLIES AND CONNECTION OF SENSOR CABLE


    Sensor tap installation picture

    • 10. Connect flexible from the tap the 'outlet' point of control box
    • 11. Connect cold/pre-mix water supply to the 'inlet' point of the control box
    • 12. Connect the sensor cable from tap to the control box. Test and finish