ATX-0049H Swivel-neck Sensor Electronic Sensor tap

ATX-0049HTall swivel-neck design sensor tap with integrated spout sensor
Product Info
- Features
- Technical Information
- Dimension
- Contents
- Functions
- Temperature Control
- Remote Control
Tall 'Goose' neck design sensor tap
Height: 321.5mm
Integrated 'hidden' spout sensor
Automatic distance 'sensor-to-sink' adjustment
Single supply
Power: Mains/4XAA Alkaline batteries (up-to 2yr lifespan)
Hands free infrared activation
Swivel-neck design
Solid-brass outer-shell construction
Finish: Chrome-plated
1x Flexible supply hose
Control box: Diameter of 'inlet' pipe: G1/2”
Control box: Diameter of 'outlet' pipe: G1/2”
Water pressure range: 0.75 (Min) - 7 Bar (Max)
Voltage: DC6V or AC220V-240V (6V Output)
Power consumption: =0.3mW
Sensing distance: 6-24cm
Respond time: 1 Second
Battery Consumption (DC): 4xAA alkaline batteries (up-to 2yr lifespan depending on level of usage)
Silent Consumption: 0.003mW
Environment Temperature: 1-45 C
Flow Rate: 6L/Per minute
Pipe Threading: British Standard Whitworth (BSW)
Noise Class: 1
Finish: Chrome-plated
Voltage: DC6V or AC220V-240V (6V Output)
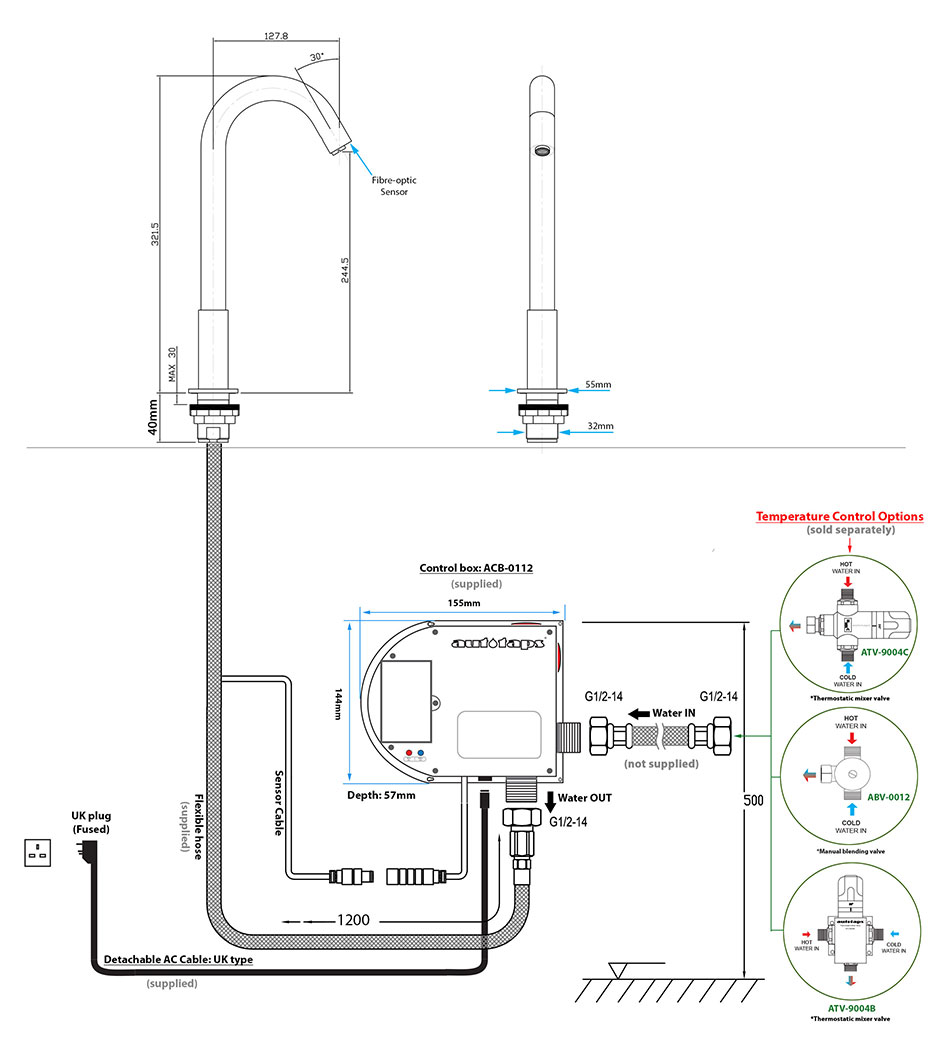
1x Sensor Tap (with flexible hose attached)
1x Control Box (*battery compartment inside)
1x AC cable (UK plug)
1x Transformer (Built inside control box)
1x Control box 'wall-mounting' clip
Fittings and Screws
Nothing to display.
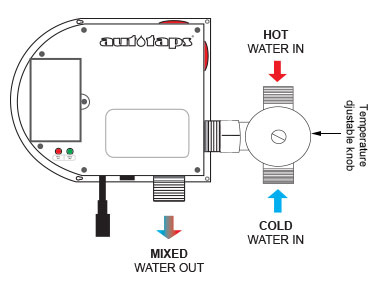
OPTION 1: ATV-9004C |
|
 |
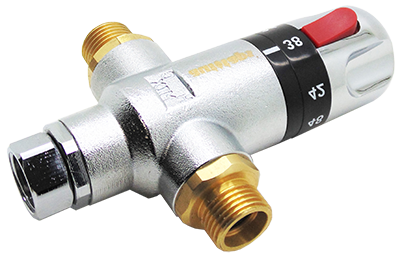 |
| This thermostat can be connected directly to the control box using its 1/2" female outlet connector. This method is usually the quickest way to setup installation. |
|
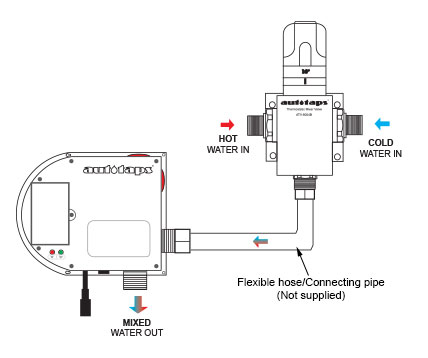
OPTION 2: ATV-9004B |
|
 |
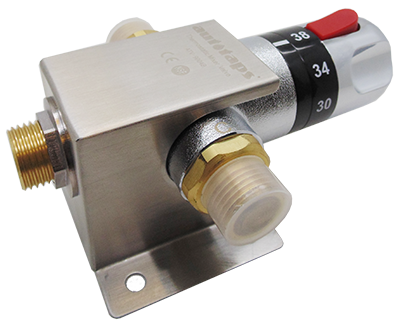 |
| This thermostat has a 'wall-mounting' bracket that can be mounted on the wall and linked to the control box 'inlet' via a connecting pipe or a flexible hose (not supplied). TIP: You can run up-to three (3) sensor taps (maximum) with one thermostat. Water pressure of both hot and cold supplies must be at least 3 bar. |
|
OPTION 3: ABV-0012 |
|
 |
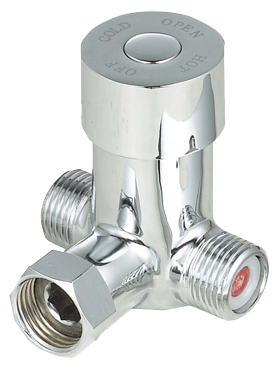 |
| This is a manual blending valve, adjustable by hand only. There's no thermostatic mixing element inside. Any desired temperature can only be achieved 'manually' by turning the knob clockwise or anti-clockwise by hand. |
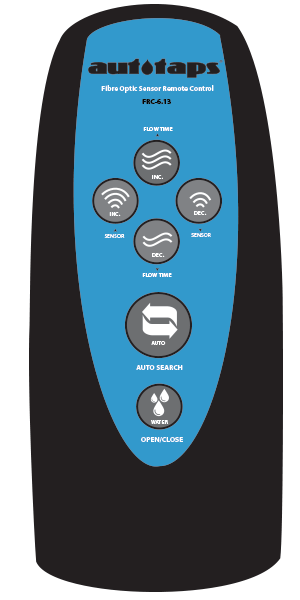
FRC-613 Remote Control
Sold separately |
 |
FLUSH/RUN Water: Flow Time Increase HOW TO: NOTE: |
 |
FLUSH/RUN Water: Flow Time Decrease HOW TO: NOTE: |
|
|
Increase Sensor Distance HOW TO: *Sensor distance range scope is around/between 7cm-35cm |
|
|
Decrease Sensor Distance HOW TO: *Sensor distance range scope is around/between 7cm-35cm |
|
|
Auto Search |
|
 |
Standby To disable, press once, LED light comes on and stays on for 2-3 seconds ‘twice’ and then goes off. Standby mode is now disabled. |