ROS-0027 Waterfall effect designer automatic sensor tap

ROS-0027Waterfall effect designer automatic sensor tap
Rosensa Sensor tap is a bold new design with stylish feel and look. Reliable infrared technology with greater accuracy than any similar infrared sensor in the market.
Autotaps sensor will only detect moving things, therefore, no false trips from light reflections or continual Infrared beam creep.
Also available in Luxury 24-carat Gold
Product Info
- Features
- Technical Information
- Dimension
- Contents
- Functions
- Temperature Control
- Remote Control
Rosensa Design sensor tap
Stylish Goose-neck design
Solid brass construction design
Unique waterfall effect
Single supply
Mains/4XAA Alkaline batteries (Up to 2-Year lifespan)
Hands free infrared activation
Flexible supply hose
Diameter of 'inlet' pipe: G1/2”
Diameter of 'outlet' pipe: G1/2”
Water pressure range: 0.7 (Min) - 8 Bar (Max)
Voltage: DC6V or AC220V-240V (6V Output)
Power consumption: =0.3MW
Sensing distance: 10-31cm
Respond time: 1 Second
Battery Consumption (DC): 4xAA alkaline batteries (2 years lifespan depending on level of usage)
Silent Consumption: 0.003W
Environment Temperature: 1-45 C
Flow Rate: 7L/Per minute
Pipe Threading: British Standard Whitworth (BSW)
AC+DC Power: This sensor tap can be powered by either Mains or battery or both
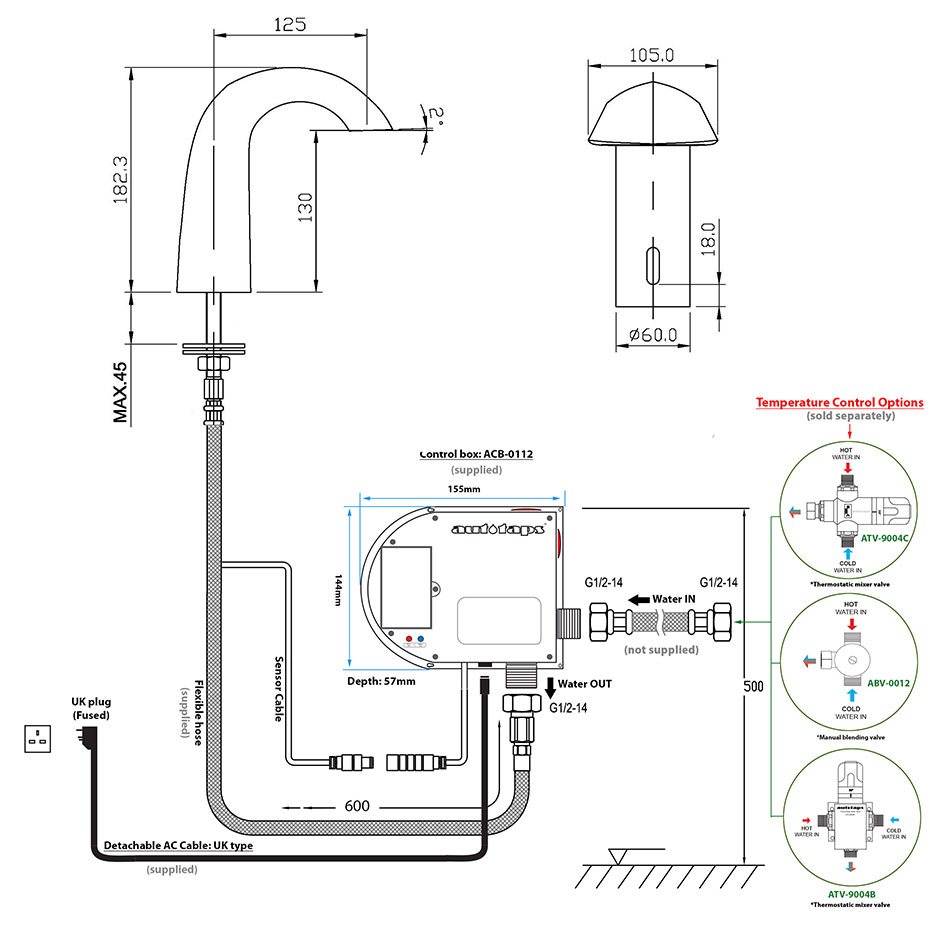
1x Sensor Tap
1x Flexible hose
1x Control Box (*battery compartment inside)
1x AC cable (UK plug)
1x Transformer (Built inside control box)
1x Control box 'wall-mounting' clip
Fittings and Screws
Nothing to display.
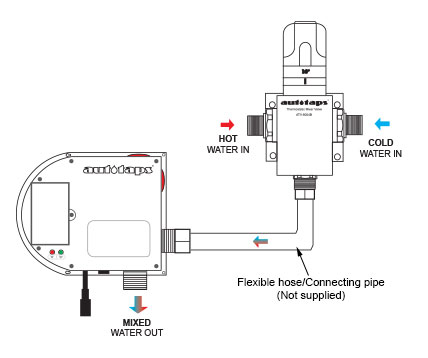
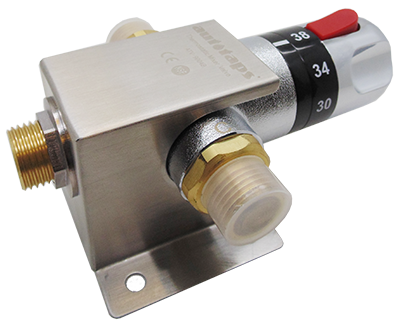
OPTION 1: ATV-9004C |
|
 |
 |
| This thermostat can be connected directly to the control box using its 1/2" female outlet connector. This method is usually the quickest way to setup installation. |
|
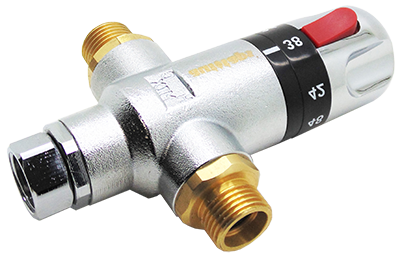
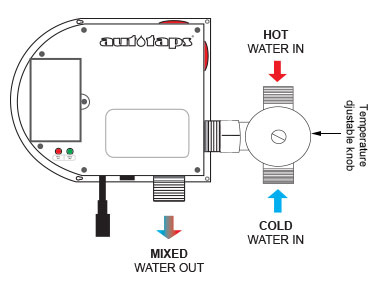
OPTION 2: ATV-9004B |
|
 |
 |
| This thermostat has a 'wall-mounting' bracket that can be mounted on the wall and linked to the control box 'inlet' via a connecting pipe or a flexible hose (not supplied). TIP: You can run up-to three (3) sensor taps (maximum) with one thermostat. Water pressure of both hot and cold supplies must be at least 3 bar. |
|
OPTION 3: ABV-0012 |
|
 |
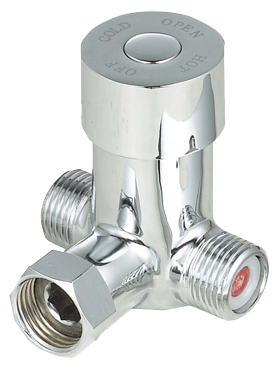 |
| This is a manual blending valve, adjustable by hand only. There's no thermostatic mixing element inside. Any desired temperature can only be achieved 'manually' by turning the knob clockwise or anti-clockwise by hand. |
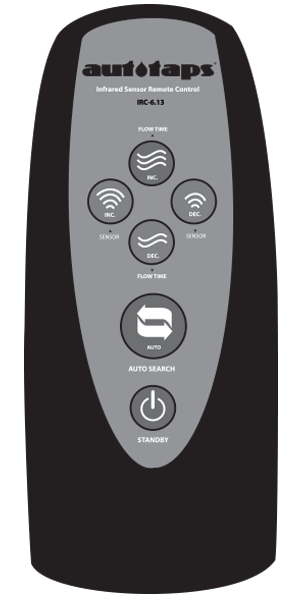
IRC-613 Remote Control
Sold separately |
 |
FLUSH/RUN Water: Flow Time Increase HOW TO: NOTE: |
 |
FLUSH/RUN Water: Flow Time Decrease HOW TO: NOTE: |
|
|
Increase Sensor Distance HOW TO: *Sensor distance range scope is around/between 7cm-35cm |
|
|
Decrease Sensor Distance HOW TO: *Sensor distance range scope is around/between 7cm-35cm |
|
|
Auto Search |
|
 |
Standby To disable, press once, LED light comes on and stays on for 2-3 seconds ‘twice’ and then goes off. Standby mode is now disabled. |